
Media Tools
Ce contenu n’est pas encore disponible dans votre langue.
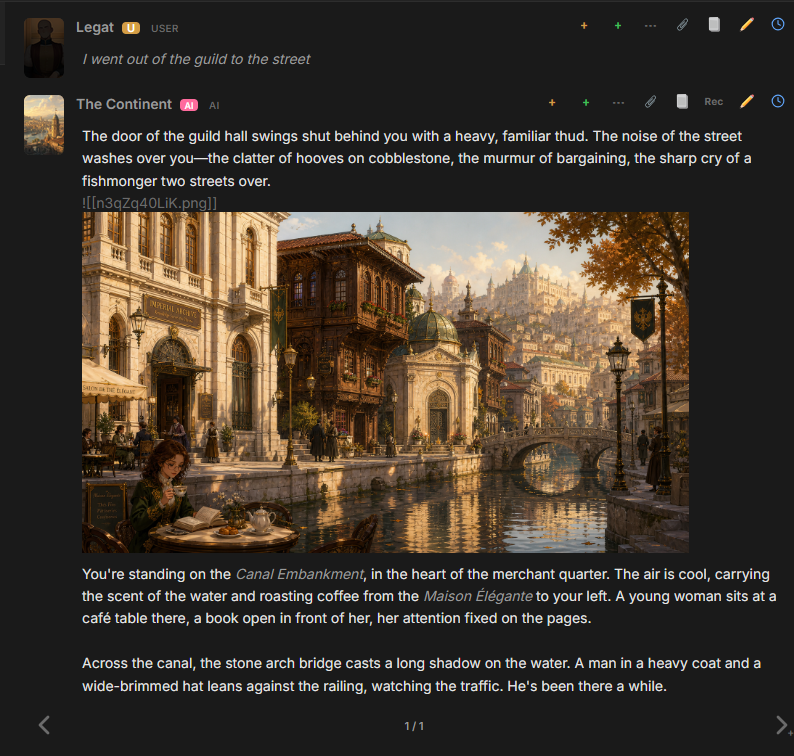
Media Tools connect text generation to image generation. A chat model writes the reply and can request an image from a separate image provider. The text model and image model do not need to come from the same provider: a local text model can call xAI, or an OpenAI text model can call NovelAI.
A Media Tool is a Prompt Manager node. It contains the instruction shown to the chat model, the image provider connection, the image model and its settings. Each node also has an independent workspace for manual generation.
Screenshot (An AI-generated image accompanying a text reply):
Add a ready-made Media Tool
Section titled “Add a ready-made Media Tool”The Card Preset catalog contains configured image-generator Cards for Google AI, OpenAI, xAI, and NovelAI. This is the shortest path to a working tool:
- Open Chat Cards or Global Cards.
- Select Add.
- Open Card Presets.
- Add the image-generator preset for the required provider.
- Open the added Card and configure the Media Tool connection, model, and provider settings.
- Enable the Media Tool node and keep the Card’s Ctx switch enabled in the chat.
The bundled image-generator presets cover Google AI, OpenAI, xAI, and NovelAI. To use Vertex AI or ComfyUI, create a Media Tool node or change the provider on an existing one.
The Card must enter the chat Prompt Manager through a CARD PROMPTS node. See Prompt Manager for that assembly step.
Create a Media Tool node
Section titled “Create a Media Tool node”To build a tool directly:
- Open a chat or Card Prompt Manager.
- Click Media Tool button in the Prompt Manager toolbar.
- Open the new node from the Prompt Manager.
- Configure the provider in Settings and the chat-model instruction in Prompt.
- Use Generate for manual generation and History for earlier attempts and shared sessions.
The node stays at its position in the Prompt Manager tree. Its enabled state and the enabled state of its parent folders determine whether its instruction is available during generation.
Settings
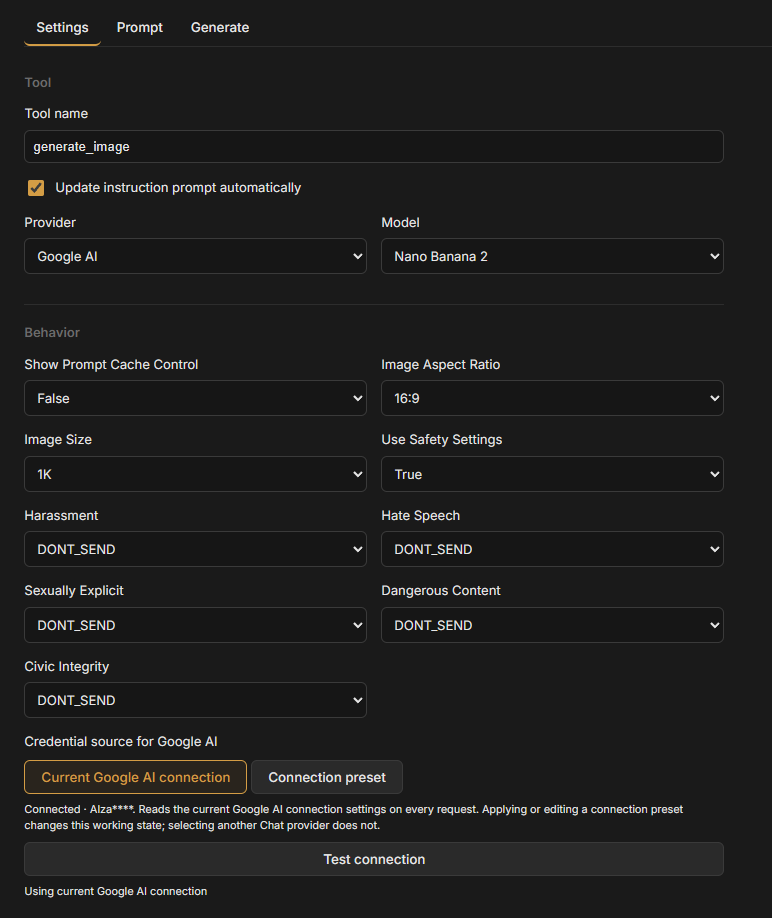
Section titled “Settings”Set the Tool name to the function name presented to the chat model. The default is generate_image.
Choose the image Provider and Model, then configure the options exposed by that provider.
Connection
Section titled “Connection”Each Media Tool has its own image-provider connection. Select Current provider connection to use the active connection, or select a Connection preset and choose Select Connection Preset.
A connection preset supplies the API key for the selected provider. The Media Tool still owns its provider, model, endpoint, and image settings.
This separation lets several Media Tools use different accounts, endpoints, or providers while the chat continues to use its own text-generation connection.
Screenshot:
Output folder
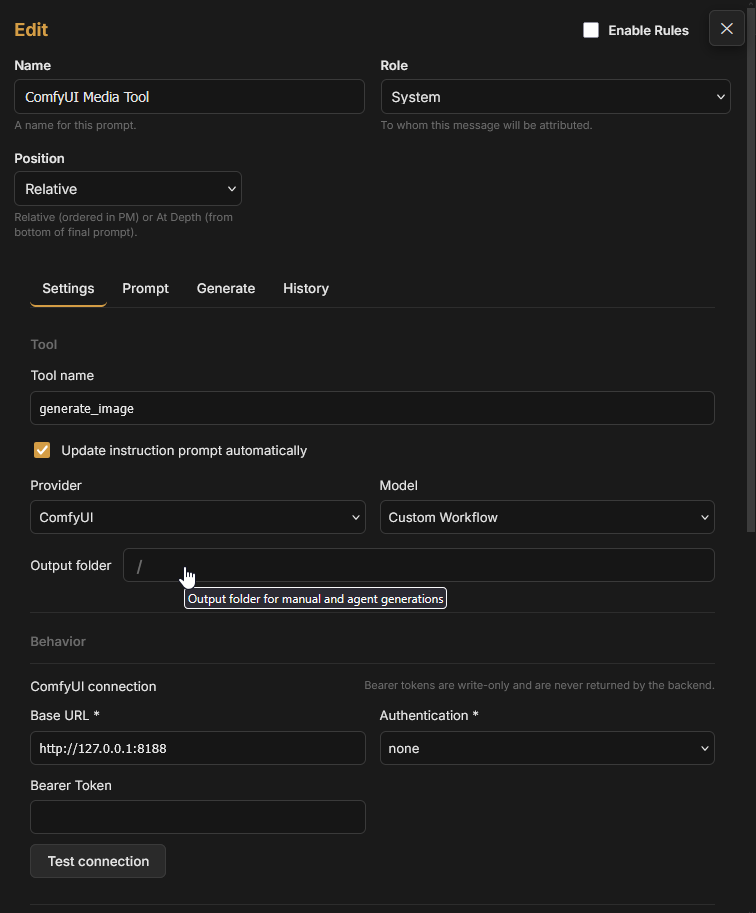
Section titled “Output folder”Output folder selects a folder in the Files library for images generated by this tool, both manually and from chat. The default is the Files root, shown as /. Open the folder picker to select a destination; Reset to Files root clears the selection.
The destination is a TavernAI library folder, not a path on the operating system or ComfyUI’s own output directory. Files saved there can be previewed, renamed, moved, and reused through their file markers.
Screenshot:
Instruction prompt
Section titled “Instruction prompt”The Prompt tab contains the instruction sent to the chat model. It explains the tool-call format and the selected image model’s available inputs.
Update instruction prompt automatically rebuilds this instruction when the tool name, provider, model, or settings change. Keep it enabled for normal use. Turn it off when the chat model needs a custom instruction, then edit the prompt directly. Reset Prompt restores a generated instruction.
Use Final Prompt Viewer to confirm that the instruction reaches the text model.
Image requests in chat
Section titled “Image requests in chat”When the chat model emits a valid Media Tool request, TavernAI starts image generation and places the execution state inside the message.
The marker can show:
- Generating image… while the request is running;
- Image generation failed when the provider rejects the request or generation fails;
- Image generation cancelled when the execution is cancelled;
- Generation unavailable when the tool can no longer be resolved.
A failed request can be inspected, retried, or removed. After successful execution, the marker is replaced by generated image file markers, and the images render as part of the same message.
The text model decides when to request an image. Its model capabilities, the active conversation, and the Media Tool instruction all affect that decision. A valid provider connection does not force every reply to contain an image.
Generate manually
Section titled “Generate manually”Open the Media Tool’s Generate tab to use the same provider without asking the chat model to call it.
- Enter the image Prompt.
- Enter a Negative prompt when the tool supports it, including NovelAI and ComfyUI workflows with a negative-prompt binding.
- Add reference image markers when the selected provider and model accept references.
- For a ComfyUI workflow with multiple-output support, set Output count if needed.
- Select Generate image.
Screenshot (Manual generation):
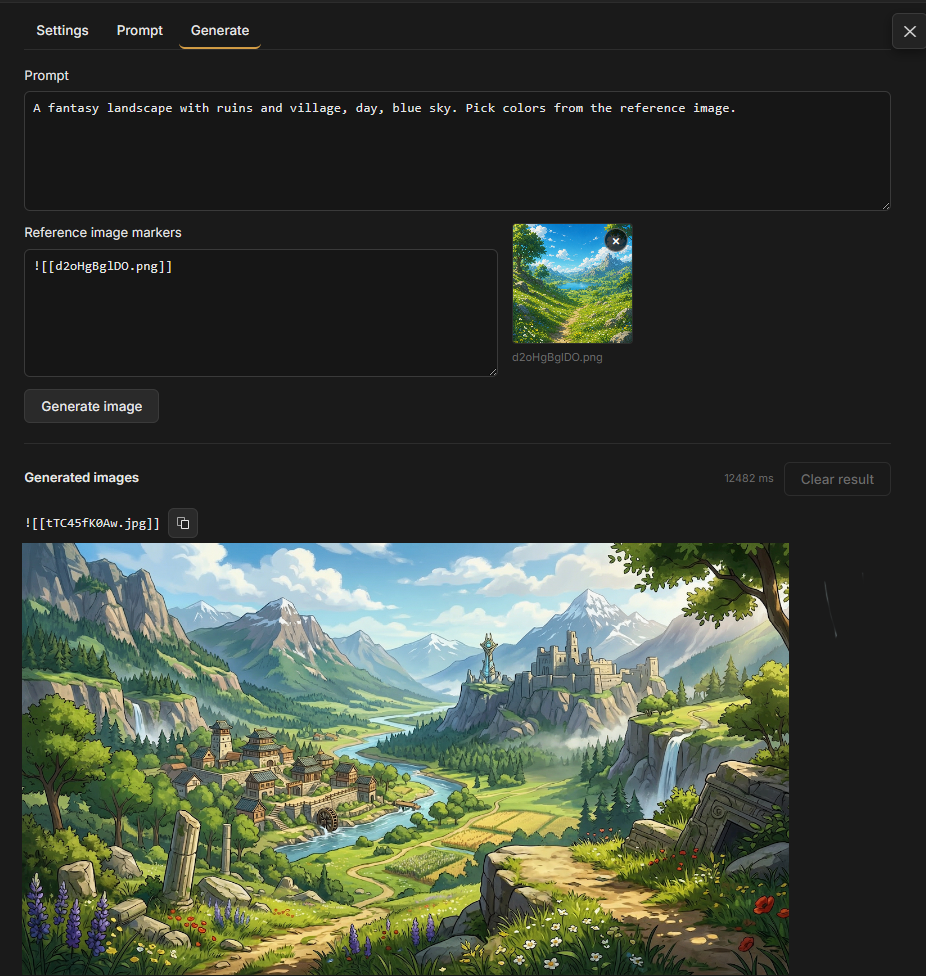
The workspace belongs to that Media Tool node. Its prompt, negative prompt, references, and latest result remain available when the editor is reopened. Running generation again replaces the displayed latest result; earlier attempts remain in History, and files already inserted elsewhere are unchanged.
Under Generated images, copy a file marker for use in a prompt or message. Open images from History or the Files library to inspect them. Clear result clears the workspace result without deleting generation history or changing earlier chat messages.
Generation history
Section titled “Generation history”The History tab contains manual attempts and image requests made from chat, including failed and cancelled attempts.
Screenshot (Generation history):
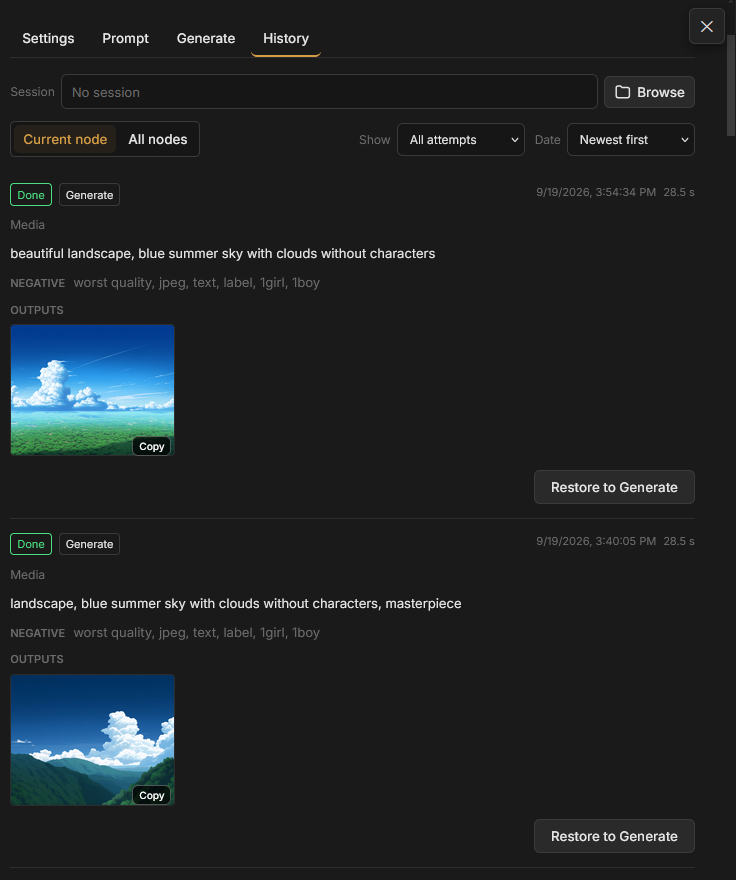
Without a session selected, choose Current node to see this Media Tool’s attempts or All nodes to see attempts across your Media Tools. Use Show to select All attempts, Successful, or Unsuccessful, and Date to choose newest or oldest first.
Each entry shows the prompt, negative prompt when present, provider and model, status, date, and available timing information. Reference images and outputs can be opened or copied as file markers. Failed attempts show their errors. Deleted files appear as unavailable.
Screenshot placeholder: History showing Current node and All nodes, outcome and date filters, one successful attempt with images, and one failed attempt with an error.
Restore a request
Section titled “Restore a request”Restore to Generate fills the Generate tab with the entry’s prompt, negative prompt, and available reference images. Missing references are skipped with a warning. It does not start generation or restore the earlier provider, model settings, or output count.
Review the current tool settings, then select Generate image. ComfyUI uses the workflow currently stored on the Media Tool node; History does not restore an earlier workflow graph.
Shared sessions
Section titled “Shared sessions”A Session groups generation attempts independently of the Media Tool node. Select the same session in several nodes to collect their subsequent attempts in one history.
- In History, select Browse beside Session.
- Create or select a named session. Use folders to organize sessions.
- Select that session in each Media Tool whose new attempts should join it.
With a session selected, History shows Session history in place of Current node / All nodes. The outcome and date filters still apply. Deselect session returns to the current node’s history and stops assigning its new attempts to that session. Selecting a session does not move earlier attempts into it.
Sessions organize image-generation attempts. They do not create chats or MultiChat Projects, and they do not choose where image files are stored; Output folder controls that separately.
Screenshot placeholder: The session browser with named sessions inside folders, a selected session path, and Session history containing attempts from two Media Tool nodes.
Sharing and importing tools
Section titled “Sharing and importing tools”Media Tools imported from a TAI pack start disabled. Configure their local connection and review the tool before enabling the node. Imported tools do not require a separate execution-approval step.
TAI transfer includes the portable tool configuration, but excludes local connection settings, the Output folder selection, and the ComfyUI workflow. Choose the connection and output folder on the receiving installation. For ComfyUI, import the API workflow separately and configure its bindings and outputs before enabling the tool.
Troubleshooting
Section titled “Troubleshooting”The text model never calls the tool
Section titled “The text model never calls the tool”- Confirm that the Media Tool node, its parent folders, and the owning Card’s Ctx switch are enabled.
- Confirm that the chat Prompt Manager contains CARD PROMPTS when the tool is stored on a Card.
- Open Final Prompt Viewer and search for the tool name.
Generation fails
Section titled “Generation fails”- Open the failed marker and inspect its payload or error.
- Test the Media Tool connection from its Settings tab.
- Check History for the failed attempt and its error.
- For ComfyUI, use Check workflow and confirm that the required nodes and models are available on that server.
Related pages
Section titled “Related pages”- ComfyUI for API workflow import, bindings, and image outputs.
- Files for file folders, previews, and reusable markers.
- Global Cards and Card Presets for reusable tool Cards and bundled presets.
- Prompt Manager for tree order, Card prompts, and attachment behavior.